Posted on June 26 2023
When it comes to DIY concentrates, it’s difficult to recommend a safe and easy solution for home growers. Making them often involves volatile chemicals in order to extract the delicious phytochemicals… Which then requires an expensive investment in equipment, training, a proper space (which non-commercial environments mostly DON’T have!), and you run a dangerous risk.
Even methods such as ice water extraction or a rosin press both leave the starting material somewhat unusable afterwards (or at least significantly more difficult to utilize as a smoking/vaping product) while generally taking a good chunk of skill for decent results.
But one extraction technique works well, cheaply, and efficiently with little know-how - dry sifting or simply rubbing plant material against screens. Knocking off tiny trichomes is easy to do, your starting material is mostly still usable afterwards, and it can be used as an even more potent starting base for things such as edibles or even other concentrate methods such as rosin making… And even by itself, it can offer a potent potable!

There’s a lot of theories and methods for using a sifting screen or box. Let’s go over some of the methods for using a dry sift box - starting from most basic up to how to make the top-shelf full melt:
Basic Method
Store some of your buds or all of your dried trim inside a sifter box. Leave it there and whenever you go to pull material, give it a gentle shake for a second or two. Every now and again, check in the lower collection chamber to see what you’ve got. This produces a final product that is generally of medium quality depending on your starting material… The gentleness is key though to prevent non-chemically active plant material from falling through the screen.
Mechanical Method
Add your material to the top chamber - leaving enough room for it to move (so your sifter box is about ½ filled). Put the cover back on and shake gently while counting to 60. After that, reopen the lid and carefully flip over the material, close the top, and shake for another 20 seconds. Now you can open back up the top lid, remove the material, and set it aside for other uses. You can repeat this process until you’re out of material to sift - then collect your golden-green harvest in the second chamber. This will produce low to medium quality concentrates - but it will produce a lot more than the Basic Method!
Quick Full Melt Method
First, break apart your starting material into smaller pieces - do not grind it but use your fingers to pick apart anything larger than a nickel. Next, take the bottom collection tray off of your box and get two pieces of parchment paper laid out flat on a clean area. You will be collecting the material on these instead - in order to make it easier to properly get both grades of top-shelf sift. Label them A and B.
With your pollen sifter box sitting over the A parchment paper piece, fill the top chamber of the box half way. Gently move the material around, lightly scraping it against the screen. You only need to do this for 10-15 seconds or so. Do not bump or shake the box itself during this process! Take the material out and set aside. Now, take your box and gently lift it (without shaking or bumping anything!) and place it onto the second piece of parchment paper. Flick the sides of the box and the screen ~6-10 times in different areas around the box.
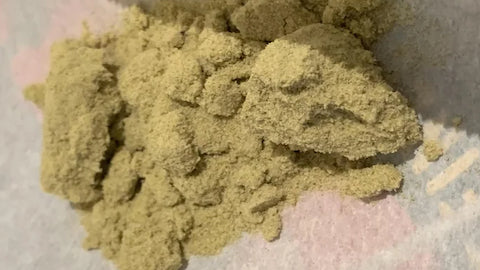
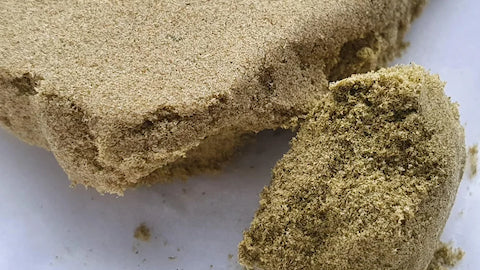
Now take your box and put it back over the A parchment if you have more material to sift. Repeat as necessary. The material in the A paper will be your best quality - it will be 90+% resin heads and the B paper will still have a lot of heads but more pistils and other plant material. The A material is what is known as “full melt” and you can even dab it!

Now, are there other ways to do this same idea? Of course! Dry sifting has been around since the cavemen times - there's a lot of methods out there. But with these three easy methods, you can get excellent results quickly, on a small scale.
Additional Tips and Tricks:
- Try to only use material that is very dry. If you just finished trimming your material, it’s not the time to dry sift just yet. Ideally, material used should be drier than you’d normally like for long-term storage - where flowers crumble to dust if squeezed too hard in your fingers.
- Start with frozen products for the second two styles. Place your material in an air-tight container and allow it to sit in your freezer for at least an hour before sifting. The cold will make the trichome stalks more brittle, making it easier to separate.
- Sift buds separate from trim instead of mixing them together.
- Make sure your sifter box is clean (use 90+% isopropyl, a brush, and sit in front of a fan to dry to clean it) otherwise any contaminants can end up in your final product.
- Be patient! This is a slow and delicate process - take your time.
- Make sure to tap the screen and the sides of the box gently to help the trichomes fall through the screen.
- Remember: Fire in, fire out - the better your starting material, the better your final product will be!
- Once you’ve collected your final product, store in an airtight container in a cool, dark place. You may also wish to preserve it as a “puck” and we recommend our Pollen Press to help make little discs that make it easier to handle later on or when traveling.
Naturally, we also have a video that has even more info / shows the product in use here on our YouTube page that demonstrates the first two methods. For more help or questions, contact Concierge Services if you have an account with us and our team will be happy to walk you through any method.
Written by Kyle Hamilton